Sunday, October 31, 2010

Mr. and Mrs. Gray!


This layout is for Scrapbook Steals online challenge #3: Thankful. I also used the sketch from Sketchy Thursdays 10/28. It's been awhile since I have played over there! This sketch was perfect for these photos of my husband and I being pronounced Mr. and Mrs. Gray! Thanks for stopping by! Happy Halloween!

Here is my recipe:

Tie the Knot and Songbird cricut cartridges
Basic Grey's Green at Heart collection
Martha Stewart border punch
Stampin' UP's Rose Red ink
By the Yard Thickers
Making Memories blossoms and brad

Saturday, October 30, 2010

Boo!


I made this Halloween card really quick this afternoon. I used Paper Doll Dress Up for the ghost costume. The pp is from Fancy Pants Trick or Treat and I used a Martha Stewart border punch on the bottom. The sentiment is from Pink by Design's A Haunting We Will Go. I love how they stamp!! I used Stampin' UP's Only Orange ink. And I got to use my new word window punch for the first time along with the modern label! Thanks for stopping by!

Off the Wall Craftiness #31: inspiration photo
Fantabulous Cricut #33: Frighten me...or not

With This Ring...


This LO is for Scrapbook Steals online crop challenge #2. We had to follow this recipe:

1 sheet of shaped paper
2 photos (no more, no less)
3 words in your title
4 chipboard embellishments and / or flowers
5 sentences in your journaling

I used Basic Grey's Eva collection for the papers, chipboard, and alphas. I used the Songbird cricut cartridge to make my die cut sheet since I only had 1 die cut paper and it wasn't the right colors for what I wanted. I really like how it came out. For the journal sheet, I used a QuicKutz embossing folder. Thanks for stopping by!

Friday, October 29, 2010

Scrapbook Steals Monday Card Madness #4, CFTA #6


I made this card using the sketch for Scrapbook Steals Monday Card Madness #4 and Challenges from the Attic #6 to use ONLY black and white. This sketch is for a gatefold card. This is my first attempt at a gatefold. Scrapbook Steals had excellent directions on how to make one here. This was sooooo easy! I think it took me a total of 5 minutes to make this card. I did have a hard time finding the black and white pp that I wanted to use! I finally found some in my retired Stampin' UP stash. I used stamps from SU's Happy Moments and Vintage Labels. I used basic black ink and punched out the sentiment with my 1 3/4 circle punch. The ribbon was also from my stash. Thanks for stopping by!

Thursday, October 28, 2010

Scrapbook Steals Mid Week Mojo #15


It's Mid Week Mojo time again! Number 15 this time so we are halfway to another Diamond Club! This week also counts as challenge #1 for tomorrows special online crop. There were 3 other challenges posted today so I have a lot of work to do! I am on a roll with my wedding pictures now! This layout is of my mom's side of the family. I think I will try to do my dad's side of the family and Steve's family with the other challenges posted today.

Here is my recipe:
Basic Grey Bittersweet collection: pp, journal block
Tie the Knot, Home Accents, and Songbird Cricut cartridges
brads from BG Euphoria, Little Yellow Bicycle, and Making Memories
flowers from Prima, Making Memories, and Creative Impressions
Stampin' UP Rose Red ink and marker

Ok I am off to the next challenge! Thanks for stopping by!

Tuesday, October 26, 2010

A Happy Birthday Tree part 2!


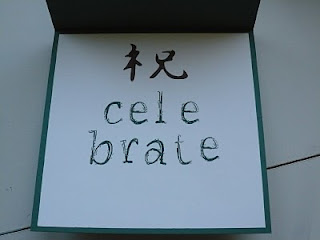
Today is my husband's 36th birthday! I had a hard time deciding what to do for his card. I eventually decided on the color combo from Off the Wall Craftiness #30 and the sketch from Scrapbook Steals Monday Card Madness #3. I used the pagoda cricut cartridge to cut out the tree and the "celebrate" for the inside. I used Close to my Heart Precious Alphabet stamps for "celebrate" since the diecut came out way too small and was unreadable. The ink is SU's Handsome Hunter. The pp is from Basic Grey's Mellow collection. The brown cardstock is Stampin' UP's chocolate chip and the green is some from my stash. The ribbon is American Crafts and the 36 is from my package of By the Yard Thickers. Thanks for stopping by!


Monday, October 25, 2010

Cheap Stickles storage...ie. free!


I was working on a couple different things today, but neither is ready for posting. So I thought I would share what I did over the weekend. My drawer that I was storing my Stickles in was getting full and I really wanted some way to store them upside down. I used this amazon box that normally would have just gone in the recycling. I used my creative memories circle cutter to make 1" circles on the 2 top flaps. Then I used an exacto knife to cut the circles out since the circle cutter didn't go all the way through. My husband was helping me with that. :) Then he constructed a few supports inside the box so that it wouldn't collapse. Then we taped it all shut! As you can see, I have plenty of extra holes for more! Thanks for stopping by!